Steel Pipe Testing
Steel having a hollow section that is much longer than the diameter or circumference. According to the cross-sectional shape, it is divided into round, square, rectangular and special-shaped steel pipes; it is divided into carbon structural steel pipe, low-alloy structural steel pipe, alloy steel pipe and composite steel pipe according to the material; it is divided into conveying pipeline and engineering structure according to the purpose. For thermal equipment, petrochemical industry, machinery manufacturing, geological drilling, steel pipes for high-pressure equipment, etc.; according to the production process, it is divided into seamless steel pipes and welded steel pipes, of which seamless steel pipes are divided into hot rolling and cold rolling (pulling). Two kinds of welded steel pipes are divided into straight seam welded steel pipes and spiral seam welded steel pipes.
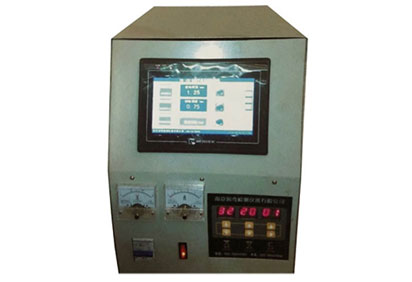
As an ultrasonic flaw detector manufacturer and supplier, we have been committed to developing and manufacturing high-quality and high-performance NDT equipment to provide customers with the best quality service.
Ultrasonic flaw detection mainly includes two methods: penetration flaw detection and reflection method. Penetration testing uses two probes, one for transmitting ultrasound and one for receiving ultrasound. During the inspection, the two probes are placed on both sides of the workpiece, and the internal quality of the workpiece is determined according to the change of energy after the ultrasonic wave penetrates the workpiece. The high-frequency pulse excitation signal generated by the reflection method is applied to the probe, and the generated wave propagates to the inside of the workpiece. If there is a defect inside the workpiece, a part of the wave is reflected back as a defect wave. The bottom wave will also reflect back. According to the position of the emitted wave, the defect wave and the bottom wave relative to the scanning baseline, the defect position can be determined; the size of the defect can be determined according to the amplitude of the defect wave; the nature of the defect can be analyzed according to the shape of the defect wave; if there is no defect inside the workpiece, only launch wave and bottom wave.
In the process of flaw detection, it is first necessary to understand the technical requirements of the drawings for welding quality. The acceptance criteria for steel structures are implemented in accordance with GB50205-2001 "Code for Acceptance of Construction Quality of Steel Structures". The standard stipulates that for the drawings, the weld quality of the weld is required to be level 1 and the level of the weld is rated as Class II, and the 100% ultrasonic flaw detection is required. For the drawings, the weld weld quality grade is Grade II, and the grade is Grade III. It is required to do 20% ultrasonic flaw detection; for the drawings, the weld quality of the weld is required to be level 3 and no ultrasonic internal defect inspection is performed.
It is worth noting here that ultrasonic flaw detection is used for full penetration welds, and the flaw detection ratio is calculated as a percentage of the length of each weld and is not less than 200 mm. Weld for local flaw detection.
If it is found that there is an impermissible defect, the length of the flaw detection shall be increased at the extension of the two ends of the defect. The length shall not be less than 10% of the length of the weld and shall not be less than 200 mm. When there are still impermissible defects, the weld is subjected to a 100% inspection of the flaw. In addition, the thickness of the base material to be tested, the joint type and the groove type should be known. Generally, the thickness of the base metal is between 8 and 16 mm, and the groove type has several forms such as type I, single V type and X type. After you have figured out this thing, you can prepare for the flaw detection.
The standard test block (CSK-IA, CSK-IIIA) must be used to calibrate the overall performance of the ultrasonic pipe testing equipment before each inspection operation, and the panel curve is calibrated to ensure the accuracy of the flaw detection results.
(1) Trimming of the detecting surface: Splash, scale, pit and rust of the welding work surface should be removed, and the finish is generally lower than ▽4. The trimming width of the flaw detection surface on both sides of the weld is generally 2KT+50mm or more, (K: probe K value, T: workpiece thickness). Generally, the K value is 2.5 probes based on the base material of the weldment. For example, if the thickness of the base material of the workpiece to be tested is 10 mm, then 100 mm should be ground on both sides of the weld.
(2) The choice of couplant should take into account the viscosity, fluidity, adhesion, non-corrosion on the surface of the workpiece, easy to clean, and economical, the above factors are selected as the couplant.
(3) Due to the thin thickness of the base metal, the detection direction is performed on one side and both sides.
(4) Since the plate thickness is less than 20 mm, the horizontal positioning method is used to adjust the scanning speed of the instrument.
(5) Rough flaw detection and fine flaw detection are used during the flaw detection operation. In order to get an idea of the presence and absence of defects and the distribution, quantification, and positioning are fine flaws. Scanning methods such as zigzag scanning, left and right scanning, front and back scanning, corner scanning, and surround scanning are used to find various defects and judge the nature of defects.
(6)Record the detection results, and evaluate the internal defects if they are found. The internal defects of the welding pair shall be classified according to the current national standard GB/T 11345-2013 "Non-destructive testing of welds, ultrasonic testing technology, inspection grade and assessment" to judge whether the welding is qualified. If it is found that there is a defect, the rectification notice will be issued to the workshop, and the rectification will be carried out after the rectification. Common defects in general welds are: pores, slag inclusions, incomplete penetration, unfusion, and cracks. So far, there is no mature method to accurately judge the nature of the defect, but the defect is comprehensively evaluated based on the shape of the defect wave and the height of the reflected wave obtained on the screen combined with the position of the defect and the welding process.
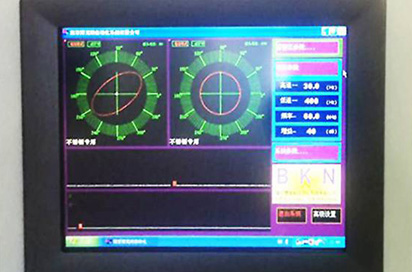
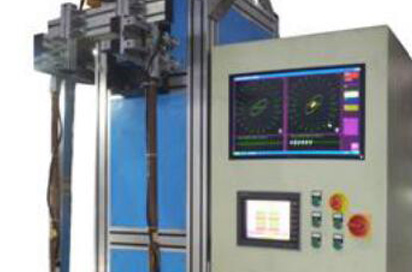
We are one of the perfect mfl suppliersand ndt equipment manufacturers,we provide steel pipe testingand eddy current testing,contact us now.
Отправить запрос, связаться с поставщиком
Другие товары поставщика
| BKNET-0102 Welded Pipe Eddy Current Flaw Detector | Eddy current weld testingis the use of eddy current technology to test the welded pipe, this type of testing is based on the premise of lossless.... | |
| Eddy Current Testing for Auto Parts | NDTApplication: Eddy current hardness testingtechnology has been widely used in the detection of metal components in the automotive The eddy cur... | |
| MFL-7389 Tube Magnetic Flux Leakage Detector | Tubing repair is an important measure to reduce the comprehensive cost of production in oil production plants to improve the quality of repairing t... | |
| Bolt Vortex Sorter BKNFX-11 | Bolt: Mechanical parts, cylindrical threaded fasteners with nuts. A type of fastener consisting of a head and a screw (a cylinder with an external ... | |
| RQ-120-B Automatic CNC EDM Notch | "RQ-120-B Electric Pulse Automatic CNC EDM notches" is a precise instrument specially developed by Nanjing BKN Automation System Co., Ltd. for maki... |
Похожие товары
| Китайская машина для обжима GT-SW30 | Продавец: Чжаосин-гуретт технолоджис лимитед | • Описание Машина для ковочной осадки круглых труб GT-SW30 специально разработана для произ... | |
| Китайская машина для обжима GT-SW01 | Продавец: Чжаосин-гуретт технолоджис лимитед | • Описание Машина для обжима GT-SW01 предназначена в основном для обжатия нагревателей горя... | |
| XJS-HPS-350X Down-paper pillow packaging machine | Продавец: Foshan Kinsun Intelligent Equipment Technology Co., Ltd | XJS-HPS-350X Down-paper pillow packaging machine Product Description Suitable for packaging sof... | |
| XJS-AW-FB Powder Filling Line | Продавец: Foshan Kinsun Intelligent Equipment Technology Co., Ltd | XJS-AW-FB Powder Filling Line Product Description Unscrambling Machine→Empty tank air blow... | |
| XJS-M Roll Film Bag Making Vertical Packaging Machine | Продавец: Foshan Kinsun Intelligent Equipment Technology Co., Ltd | XJS-M Roll Film Bag Making Vertical Packaging Machine Product Description XJS-Mseries is a roll... |


