Steel Pipe Testing
Steel having a hollow section that is much longer than the diameter or circumference. According to the cross-sectional shape, it is divided into round, square, rectangular and special-shaped steel pipes; it is divided into carbon structural steel pipe, low-alloy structural steel pipe, alloy steel pipe and composite steel pipe according to the material; it is divided into conveying pipeline and engineering structure according to the purpose. For thermal equipment, petrochemical industry, machinery manufacturing, geological drilling, steel pipes for high-pressure equipment, etc.; according to the production process, it is divided into seamless steel pipes and welded steel pipes, of which seamless steel pipes are divided into hot rolling and cold rolling (pulling). Two kinds of welded steel pipes are divided into straight seam welded steel pipes and spiral seam welded steel pipes.
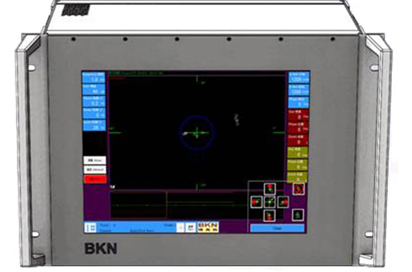
As an ultrasonic flaw detector manufacturer and supplier, we have been committed to developing and manufacturing high-quality and high-performance NDT equipment to provide customers with the best quality service.
Ultrasonic flaw detection mainly includes two methods: penetration flaw detection and reflection method. Penetration testing uses two probes, one for transmitting ultrasound and one for receiving ultrasound. During the inspection, the two probes are placed on both sides of the workpiece, and the internal quality of the workpiece is determined according to the change of energy after the ultrasonic wave penetrates the workpiece. The high-frequency pulse excitation signal generated by the reflection method is applied to the probe, and the generated wave propagates to the inside of the workpiece. If there is a defect inside the workpiece, a part of the wave is reflected back as a defect wave. The bottom wave will also reflect back. According to the position of the emitted wave, the defect wave and the bottom wave relative to the scanning baseline, the defect position can be determined; the size of the defect can be determined according to the amplitude of the defect wave; the nature of the defect can be analyzed according to the shape of the defect wave; if there is no defect inside the workpiece, only launch wave and bottom wave.
In the process of flaw detection, it is first necessary to understand the technical requirements of the drawings for welding quality. The acceptance criteria for steel structures are implemented in accordance with GB50205-2001 "Code for Acceptance of Construction Quality of Steel Structures". The standard stipulates that for the drawings, the weld quality of the weld is required to be level 1 and the level of the weld is rated as Class II, and the 100% ultrasonic flaw detection is required. For the drawings, the weld weld quality grade is Grade II, and the grade is Grade III. It is required to do 20% ultrasonic flaw detection; for the drawings, the weld quality of the weld is required to be level 3 and no ultrasonic internal defect inspection is performed.
It is worth noting here that ultrasonic flaw detection is used for full penetration welds, and the flaw detection ratio is calculated as a percentage of the length of each weld and is not less than 200 mm. Weld for local flaw detection.
If it is found that there is an impermissible defect, the length of the flaw detection shall be increased at the extension of the two ends of the defect. The length shall not be less than 10% of the length of the weld and shall not be less than 200 mm. When there are still impermissible defects, the weld is subjected to a 100% inspection of the flaw. In addition, the thickness of the base material to be tested, the joint type and the groove type should be known. Generally, the thickness of the base metal is between 8 and 16 mm, and the groove type has several forms such as type I, single V type and X type. After you have figured out this thing, you can prepare for the flaw detection.
The standard test block (CSK-IA, CSK-IIIA) must be used to calibrate the overall performance of the ultrasonic pipe testing equipment before each inspection operation, and the panel curve is calibrated to ensure the accuracy of the flaw detection results.
(1) Trimming of the detecting surface: Splash, scale, pit and rust of the welding work surface should be removed, and the finish is generally lower than ▽4. The trimming width of the flaw detection surface on both sides of the weld is generally 2KT+50mm or more, (K: probe K value, T: workpiece thickness). Generally, the K value is 2.5 probes based on the base material of the weldment. For example, if the thickness of the base material of the workpiece to be tested is 10 mm, then 100 mm should be ground on both sides of the weld.
(2) The choice of couplant should take into account the viscosity, fluidity, adhesion, non-corrosion on the surface of the workpiece, easy to clean, and economical, the above factors are selected as the couplant.
(3) Due to the thin thickness of the base metal, the detection direction is performed on one side and both sides.
(4) Since the plate thickness is less than 20 mm, the horizontal positioning method is used to adjust the scanning speed of the instrument.
(5) Rough flaw detection and fine flaw detection are used during the flaw detection operation. In order to get an idea of the presence and absence of defects and the distribution, quantification, and positioning are fine flaws. Scanning methods such as zigzag scanning, left and right scanning, front and back scanning, corner scanning, and surround scanning are used to find various defects and judge the nature of defects.
(6)Record the detection results, and evaluate the internal defects if they are found. The internal defects of the welding pair shall be classified according to the current national standard GB/T 11345-2013 "Non-destructive testing of welds, ultrasonic testing technology, inspection grade and assessment" to judge whether the welding is qualified. If it is found that there is a defect, the rectification notice will be issued to the workshop, and the rectification will be carried out after the rectification. Common defects in general welds are: pores, slag inclusions, incomplete penetration, unfusion, and cracks. So far, there is no mature method to accurately judge the nature of the defect, but the defect is comprehensively evaluated based on the shape of the defect wave and the height of the reflected wave obtained on the screen combined with the position of the defect and the welding process.
We are one of the perfect mfl suppliersand ndt equipment manufacturers,we provide steel pipe testingand eddy current testing,contact us now.
在线联系供应商
Other supplier products
| Eddy Current Testing Equipment | Automatic EDM Notchis the ideal equipment for processing artificial defects of pipe rod standards in non-destructive testing work. The flaw detecto... | |
| Eddy Current Testing Equipment for Tube, Bar and Wire | ECT Eddy current testing is a non-contact testing method, which mainly uses the electromagnetic field and electromagnetic induction between metals ... | |
| BKNET-0102 Welded Pipe Eddy Current Flaw Detector | Eddy current weld testingis the use of eddy current technology to test the welded pipe, this type of testing is based on the premise of lossless.... | |
| Wireless Transmission Pipe Ultrasonic Flaw Detector | The ultrasonic pipe testing equipmentsystem is suitable for the automatic detection of various internal and external defects of steel pipes. The pr... | |
| BKNFX Pre-Multi-Frequency Eddy Current Hardness Separator | Stimulating the coil makes a magnetic induction to the tested material. The induced electromotive force received by the testing coil is related to ... |
Same products
| XD-MAX Winch for Drone | 卖方: NEW WING ADVANCED (TIANJIN) TECHNOLOGY CO., LTD | XD-MAX Winch for Drone The XD-MAX Winch for Droneis a high-performance aerial lifting solution d... | |
| XD-55 Winch for Drone | 卖方: NEW WING ADVANCED (TIANJIN) TECHNOLOGY CO., LTD | XD-55 Winch for Drone Introducing the XD-55 Winch for Drone—an advanced lifting system eng... | |
| XD-10 Winch for Drone | 卖方: NEW WING ADVANCED (TIANJIN) TECHNOLOGY CO., LTD | XD-10 Winch for Drone SAFE, EFFICIENT AND CONVENIENT.Your reliable and intelligent air transport... | |
| Uratech ER16 Collet Rack – CNC Collet Storage for ER, DR & RD 16 Series | 卖方: Uratech USA Inc | TheUratech ER16 collet rackis a premium storage solution designed for CNC shops, toolrooms, and m... | |
| Uratech Tool scoot cart for 50 taper tool holders | 卖方: Uratech USA Inc | Maximize efficiency in your machining operations with our50 taper CNC tool carts, the ultimate so... |


